How to Make Camp Coffee That Tastes Good Outdoors
Great camp coffee comes from controlling the basics: fresh water, a measured coffee dose, steady heat, and a brewing method suited to your campsite. This practical guide compares simple options and explains how to pack and clean up responsibly.
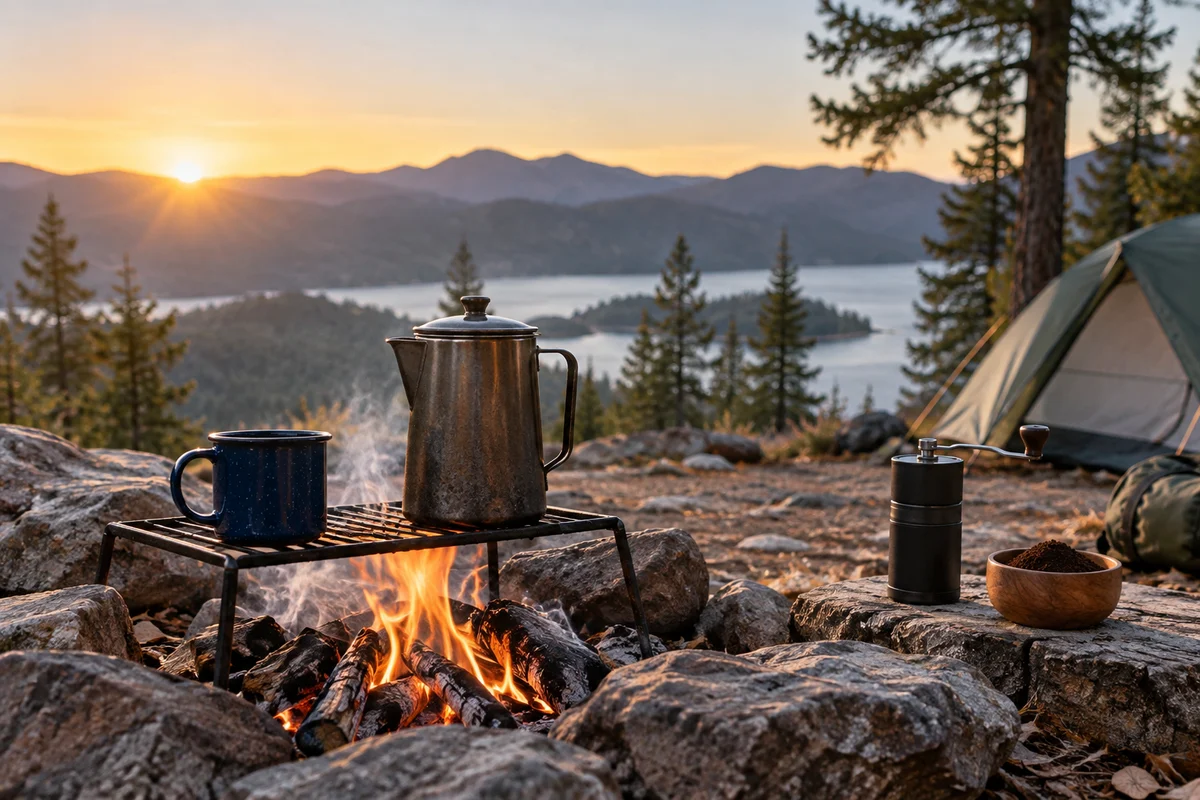
Coffee can make a cold campsite morning feel more manageable, but getting a satisfying cup outdoors is less about special gear than a few repeatable choices. If you’re learning how to make camp coffee, start by deciding how much water you can spare, how many cups you need, and whether you want a quick brew or an easy cleanup. Then choose a method and measure the coffee before the stove comes out.
This guide covers several straightforward techniques, a useful starting ratio, and the trade-offs that matter at a campground, in a cabin, or on a backpacking trip. The best method is the one you can use safely, pack out cleanly, and repeat when you’re sleepy.
Choose a method that fits your camp
There is no single best way to brew outdoors. A pour-over is simple and gives you control, but it needs a stable mug or pot and a filter. A press pot makes several cups at once, though its grounds can be awkward to clean up. Cowboy-style boiled coffee requires little equipment, but settling the grounds takes patience. Instant coffee is light and fast, especially when water and fuel are limited; its flavor varies by brand and personal preference.
| Method | Best for | What to plan for |
|---|---|---|
| Pour-over | One or two measured cups | Stable dripper, filter, careful pouring |
| Press pot | Several servings from one brew | Bulkier vessel and contained grounds |
| Boiled-and-settled | Minimal equipment | Time for grounds to settle; careful pouring |
| Instant | Fast, low-waste packing | Individual taste and serving preference |
For a first trip, use the method you already know at home. Familiarity makes it easier to spot whether a cup tastes weak, bitter, or simply different because of the water or grind. For general trip preparation, see how to prepare for camping; for a broader look at outdoor styles, browse our guide to types of hikers.
Start with a dependable coffee-to-water ratio
A practical starting point is about 1 to 2 tablespoons of ground coffee for each 6 ounces of water. This is a flexible kitchen measure, not a universal rule: roast, grind, brewing method, and taste all affect the result. If you have a scale and know your preferred home recipe, use that instead. Otherwise, measure consistently and adjust after tasting.
For two small cups, heat about 12 ounces of water and begin with 2 to 4 tablespoons of coffee. Keep a little extra water available for rinsing or topping up, but count it in your water plan. Camp mugs are often larger than a standard coffee serving, so check your mug’s capacity at home rather than assuming it holds 6 ounces.
A simple adjustment framework helps avoid random tinkering:
- Too weak or thin: Use a little more coffee next time, or let it brew longer if your method allows.
- Too bitter or harsh: Try slightly less coffee, a coarser grind, or a shorter brew.
- Sour or underdeveloped: Check that the water was hot enough and give the brew more contact time; change one variable at a time.
- Inconsistent cups: Measure both coffee and water, and keep the grind and method similar.
These are starting clues, not diagnoses. A dark roast may taste strong at a lower dose, and a particular filter or press can change extraction. Make small changes so you can tell what helped.
Pack and prepare before the morning rush
Pre-measuring coffee at home removes a fussy step from camp. Portion grounds into a reusable sealed container for each planned brew, or carry whole beans if you already bring a grinder and can keep the extra weight and effort worthwhile. Protect coffee from moisture and strong odors, and keep it separate from food that could crush or spill onto it.
Before leaving, check that your brewing vessel is compatible with your heat source and large enough for the water volume. A pot that is nearly full can slosh or boil over when moved. Set out a mug, spoon, filter if needed, and a stable place to work. Keep the cooking area clear of loose fabric and other items that could catch or obstruct the stove.
At camp, use a stove according to its manufacturer’s directions and local fire restrictions. Place it on a stable, level surface in an appropriate outdoor location, away from tent interiors and other enclosed spaces. Never operate a fuel-burning stove inside a tent or other enclosed shelter because carbon monoxide can build up. Keep children and pets clear of hot liquid, and use a pot handle or insulated grip when moving a vessel.
Brew with the method you chose
Pour-over
Put the filter in the dripper and rinse it if your setup and water allowance make that practical; discard the rinse water appropriately. Add the measured grounds and level them gently. Pour a small amount of hot water over the grounds first, let them wet evenly for a short pause, then add the remaining water in a slow, controlled stream. Avoid filling the filter to the brim. Let it drain fully before removing it.
Press pot
Add grounds to the pot, pour in hot water, and stir gently if needed to wet them evenly. Fit the lid without pressing the plunger down. After a few minutes, press slowly and steadily, stopping if you meet unusual resistance. Pour the coffee soon after plunging rather than leaving it to continue steeping in contact with the grounds, which can make the flavor harsher.
Boiled-and-settled coffee
Add grounds to hot water in a pot and stir. Keep the pot at a gentle heat rather than letting it surge into a vigorous boil. Remove it from the heat and give the grounds time to settle. Pour slowly, leaving the last muddy portion behind. This approach is forgiving in equipment but can produce a cup with sediment; pour carefully and don’t drink grounds just to avoid wasting a small amount.
Instant coffee
Heat the amount of water specified on the package or suited to your taste, then stir in the measured instant coffee. If you want a less intense cup, begin with less than the suggested amount and adjust next time. Instant can be a sensible choice when a filter or grounds would be inconvenient, especially on a trip where minimizing pack weight and cleanup matters.
Water, weather, and fuel change the routine
Cold air, wind, and a cold pot can make water take longer to heat. A windscreen can improve stove efficiency only when it is allowed by the stove manufacturer and does not create overheating or block ventilation; never improvise an enclosure around a stove. Choose a sheltered outdoor cooking spot that remains safe and stable, and plan extra time rather than leaving a flame unattended.
Use drinking-quality water. If you need to treat water from a natural source, follow current public-health guidance and the directions for your chosen treatment method; coffee brewing should not be treated as a substitute for water treatment. The U.S. Centers for Disease Control and Prevention provides guidance on making water safe in an emergency, but conditions and recommendations can vary, so check applicable local advice for your trip.
Fuel needs depend on stove design, weather, cookware, water temperature, and how much you heat. There is no reliable single fuel amount for every camp. Follow the stove maker’s instructions, bring the fuel you need for the whole trip with an appropriate reserve, and avoid repeatedly reheating a large pot when you only need one cup.
Keep cleanup simple and low-impact
Let equipment cool before packing it. Collect used grounds and filters instead of scattering them around camp. Pack them out unless the land manager explicitly allows another disposal method. Don’t assume coffee grounds are harmless to wildlife or appropriate to bury; follow the site’s rules and established low-impact practices. The Leave No Trace Center for Outdoor Ethics explains general principles for minimizing impacts outdoors.
For a press pot, scrape grounds into your waste container with a spoon or a dedicated scraper. Avoid rinsing grounds into a sink, stream, or drain. Use only the amount of wash water and soap allowed by campground or land-manager guidance, and dispose of dishwater as directed for that location. A small cloth or sponge kept with the kitchen kit can make cleanup easier without relying on a disposable paper towel for every brew.
A quick decision guide
Choose instant when speed, low weight, and minimal cleanup are priorities. Choose pour-over when you want control over a single cup and can manage the filter. Choose a press pot when several people will share a brew and you have a plan for the grounds. Choose boiled-and-settled when simplicity matters more than a sediment-free cup.
Whatever the method, make the first brew at home before relying on it outside. Confirm the portions, vessel, and cleanup routine, then adjust one variable at a time. That small rehearsal helps turn camp coffee into a dependable part of the morning rather than another piece of gear to troubleshoot.
For more, explore our camping hiking guides.
Frequently asked questions
What is a good coffee-to-water ratio for camp coffee?
Start with about 1 to 2 tablespoons of ground coffee per 6 ounces of water, then adjust for your taste, grind, and brewing method.
Can I make camp coffee without a coffee maker?
Yes. You can steep grounds in hot water and let them settle before pouring, or use instant coffee for the simplest setup.
How do I keep coffee grounds out of a stream?
Collect grounds and filters in a waste container and pack them out unless the land manager specifically directs another disposal method.
Is it safe to use a camp stove inside a tent?
No. Never use a fuel-burning stove inside a tent or enclosed shelter because carbon monoxide can accumulate.
Sources & further information
Consult these primary sources for current regulations, technical information and local guidance.