 If you are reading this article the odds are pretty good that you spend a great deal of time outdoors. No matter where you are accidents can and do happen all of the time. Some are minor, while others can be life threatening. For this reason it is extremely important to have a first-aid kit close by whenever you venture out. A first-aid kit is always with me. I carry one in my truck, there is one in my shed and there is always one in my pack. These are the kits that will keep you alive until help can arrive.
 While any first-aid kit is better than nothing, let’s face it, some are better than others. For a long time I searched for a commercially available first-aid kit that I felt fit my needs, but I could never find one. Some were nothing more than a bag with a few adhesive bandages and some gauze while others were completely on the other end of the spectrum, providing you with everything you would need to perform brain surgery. Don’t get me wrong, there are some really good first-aid kits out there that fall somewhere in between, but they never had everything I wanted. To get what I wanted would mean buying multiple kits and then building my own from the contents. That would be a waste of money and leave me with things I didn’t need. If I was going to do all of that then I might as well make my own; which is just what I did. Get what I wanted and save money in the process.
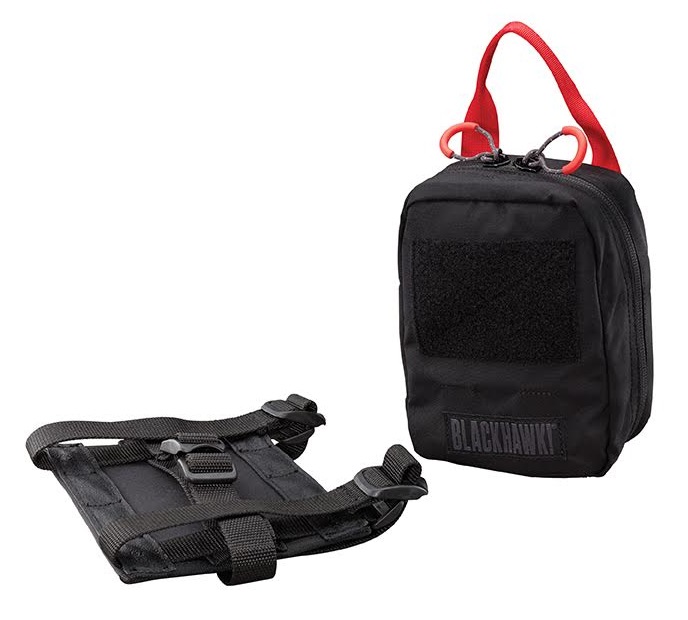
The Bag:
The bag that you carry your medical gear in is not as important as the gear that it is holding. With that said, there are some things that you want your bag to have. It needs to be large enough to carry your supplies, yet small enough to easily carry. It needs to open wide so you can access the items you need. The bag should also have a way to organize your medical items.
The brand of bag is not important and if you are going for brand and what makes you look cool, then you are defeating the purpose. I use Blackhawk medical bags because I like them and they work for me. You may be able to save some money by heading to the local Army-Navy Surplus Store and seeing what they have. It is not always less expensive, but sometime you can find what you need without breaking the bank doing it. Just make sure that you get a bag that will do the job, even if that means spending a little money doing it.
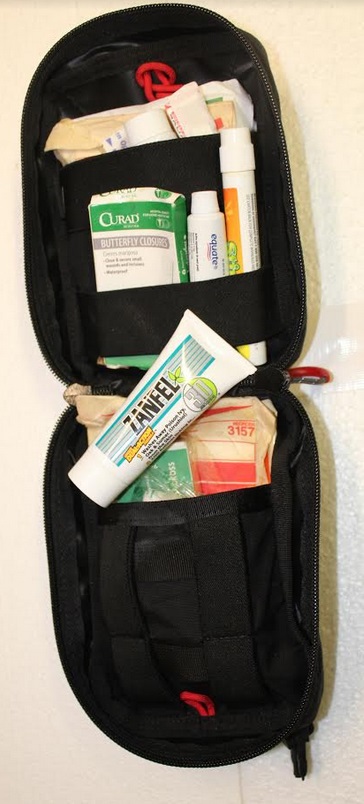
What I Carry in My First-Aid Kit: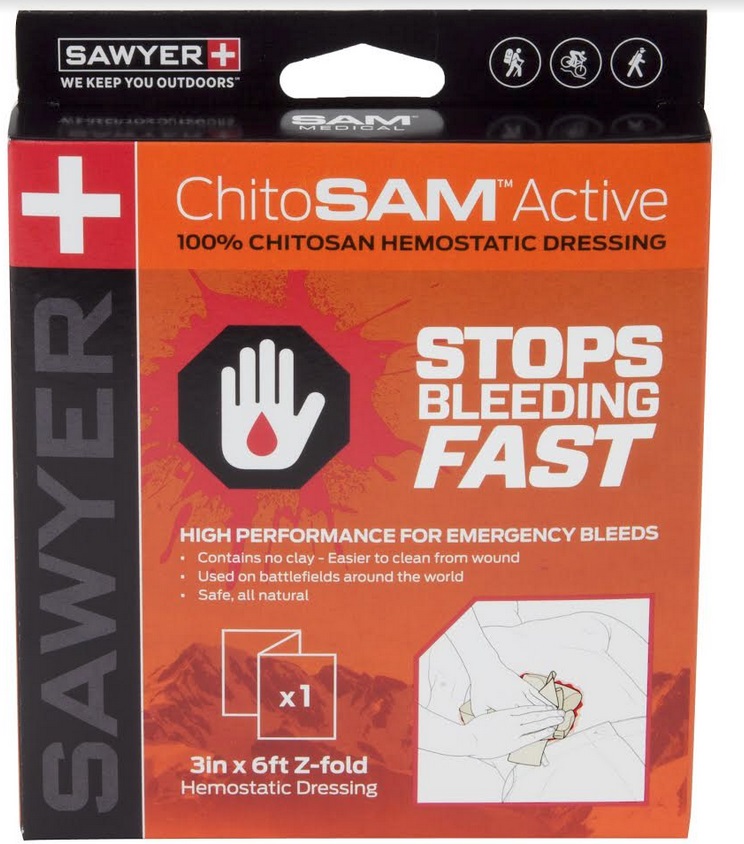
Whether the kit is in my shed, truck or my pack there are things that are always in them:
- Multiple sizes of adhesive bandages and plenty of them. There is no such thing as too many bandages and they are inexpensive.
- Multiple sizes of sterile gauze pads. Like the bandages, there is never enough.
- Antibiotic ointment or cream is a must. The skin is pretty tough, but if you get a cut or puncture this cream may fend off infection.
- Alcohol wipes for clean wounds. These things are available everywhere and cheap.
- Insect bite relief medication. Anyone who has been stung knows the pain that they cause. Every bite causes your body to react. Something like StingEze can handle minor issues. If you are allergic to bee stings or insect bites be sure to bring your medication with you in your first-aid kit and seek medical attention immediately if you are stung.
- Poison Ivy medication goes in my bag. Zanfel is one of the best that I have found.
- Hemostatic bandage like ChitoSAM. These bandages are made to stop bleeding fast.
- Pain medication should be in the bag. Over the counter pain medication is a must.
 There may be other items added to the kit depending on the area I will be going, but these items are always there.
Outside of My Kit, But Still In My Pack:
There are a few items that just can’t fit into my first-aid kit, but are vital pieces of gear that I feel should always be on hand.
- Tourniquet. There is always a tourniquet attached to the outside of my pack where I can get to it quickly. If a tourniquet is needed than speed is key.
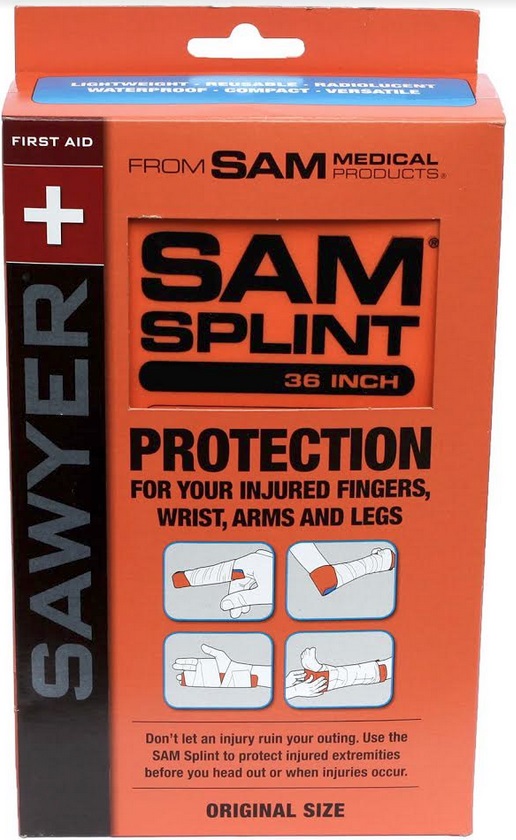
- SAMSplint. In my pack, yet still accessible. Vital when trying to stabilize broken or sprained limbs.
- Emergency or “Space” Blanket. Whether treating a person for shock or hypothermia, being able to keep them warm is vital. This item may be all that you have.
- CPR mask. You just never know when you will need to use it on someone, or someone may need to use it on you. Either way it protects you from any possible issues.
What You Don’t Need: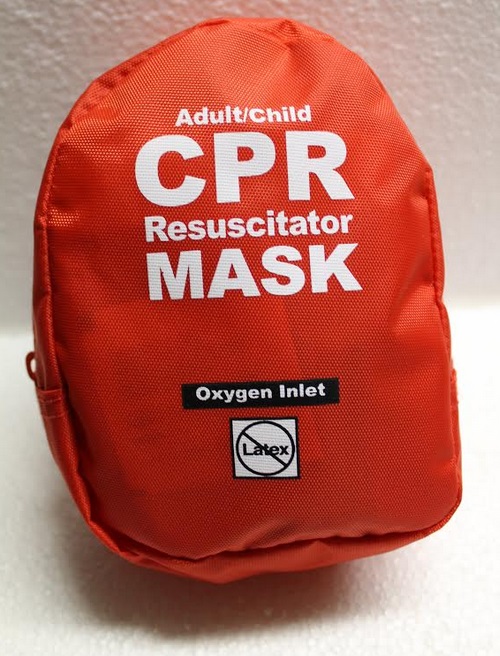
Remember, these are kits that are meant to be carried and are just stop gaps until help can arrive. No matter how many times I say this, I still run into people packing way too much medical gear. Probably worst still I see people packing gear that they have no clue on how to use. If you can only use adhesive bandages then stick to that. The last thing I want to see is an untrained person coming at me with a scalpel.
For these kits you are only packing the basics. Size is a huge restraint. Your kit is only so large so pack accordingly. Weight is also a major factor. When you are tracking a deer up a steep hillside you will come to realize that every ounce matters.
There is no need to carry any gear that is not intended for basic first-aid. Items like scalpels, sutures, dental tools, etc. are not needed and just add weight to the load. Keep these items back in basecamp. You are not in a war zone and the average person is not a trained medic and is not prepared or qualified to use some of these items.
So there you have it. While you may have to spend a little money on some of the items, for the most part you can pick everything else up for almost nothing. I have even gone to some events where banks and insurance companies will give out little “first-aid kits” with their logo on them. Really these kits are nothing more than a bag of adhesive bandages, but you can use them to fill your kit and it cost you nothing. Build the kit that works for you and save some money doing it.