
Choosing the right backpacking tent involves the following key decision points: 1) Capacity: likely number of sleepers, 2) Seasonality: tent construction relative to expected weather conditions, 3) Weight: ounces carried vs. dollars spent and 4) Livability: comfort and convenience based on design and features. Other considerations include ease of tent setup and tent materials. Also, don’t forget the footprint, often sold separately, that goes under your tent floor to protect it from routine wear or an overlooked rock or pinecone.
Shop REI’s entire selection of Backpacking Tents.
Looking for family camping or base camp tents?
See our article, Tents for Camping: How to Choose
Backpacking Tent Capacity

Backpacking tents are categorized by capacity: from 1- to 4-person models. Most tent names include a number for the capacity: REI Half Dome 2, for example.
To keep weight low, tents fit snugly. No industry standard defines per-person dimensions, so a 2-person tent size can vary from brand to brand. And ultralight models are likely to be extra snug.
If you’re larger than average, or you simply crave a little more space, consider tents designated one-person larger than your group. Or try plus-size tent designs, which offer extra length and width.
Backpacking Tent Seasonality
3-Season Backpacking Tents
- Ample mesh panels to boost airflow and keep out insects
- More upright walls to create more interior headroom
- Fewer poles and lighter fabrics to keep weight low

Extended-Season Backpacking Tents (3-4 or 3+ Season)
- One or two more poles for strength
- More upright walls to create more interior headroom
- Fewer mesh panels for greater warmth retention
Four-season tents also include more lightweight single-wall tents that have waterproof/breathable walls and no rainfly. They’re best for cold, dry conditions.

4-Season Mountaineering Tents
- More poles and heavier fabrics
- Rounded dome designs that can sustain winds and eliminate flat roof spaces where snow can collect
- Fewer mesh panels
- Rainflys that extend close to the ground

Backpacking Tent Weight
Your choice of a new backpacking tent gives you a great opportunity to lighten your overall load. Tent designs have advanced so much that models with a per-person weight of less than 3 pounds can be spacious and comfortable.
While it might seem logical that a heavier tent would also be sturdier, ultralight materials and designs can be just as strong, if not stronger. So your best indicator of strength and durability is the tent’s seasonality.
Tent Weight Specs
- Minimum trail weight: This is the weight of the tent body, rainfly and poles only—the bare essentials. You will probably pack more tent-related gear (e.g., stakes, footprint), but this is the best spec for comparison.
- Packaged weight: This is the weight of all the components you get with a purchase: body, rainfly, poles, stakes, stuff sack, pole sack, instructions and more. The weight you’ll carry on the trail will be somewhere between this and the minimum weight.
- Packed size: The amount of space the tent takes up in a pack also relates to how easy a tent is to carry. You can reduce this space by splitting up components — have your partner take the poles and rainfly, for example, while you carry the tent body.
Ultralight tents will weigh upwards of 1 pound per person, though there is no industry standard. Tents designed to be ultralight can be less spacious, less robust or have fewer features, though they can also benefit from more premium materials. Designers try to strike the ideal balance of characteristics. You can also shed ounces while maintaining a comfortable level of livability if you choose an ultralight tent that’s one person larger than your group.
Minimalist shelters:


Backpacking Tent Livability
Backpacking tents traditionally used space-efficient designs that had steeply sloped walls, narrow foot spaces and low headroom. This helped keep the weight lower, but the tradeoff was comfort.
Newer tent designs aim to open up interiors without adding unwanted weight. Other key features that affect livability include number and location of doors, protected exterior spaces and ventilation.
Interior volume: To assess tent volume, visit a store, ask to set up a tent and hop inside. If shopping online, study the pitch of its walls. If the walls angle steeply toward the tent’s ceiling, you’re probably looking at a weight-efficient tent (great!) that offers only modest interior volume (the tradeoff). The following can also help you size up a tent’s interior space and overall livability:


Tent Construction
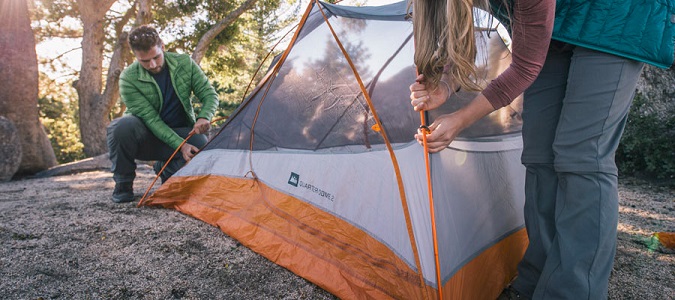
Tent Setup: Before heading out to the wilderness, set up your tent at home the first time. A freestanding tent means the tent can stand without the use of stakes, which speeds setup and makes a tent easy to reposition—just lift and move it to a new spot. Most tents are freestanding for this reason, though non-freestanding tents can be lighter because the pole structure doesn’t have to be as robust.
Additional tent setup features:


Tent Materials
Backpacking tents use high-strength, low-weight aluminum poles. Over the years aluminum poles have maintained strength while engineers have reduced weight by incrementally shrinking diameter and wall thickness. You often see DAC (Dongah Aluminum Corp.) in specs because this company is the world’s pre-eminent pole maker. You might also see a 6,000-series or a slightly stronger 7,000-series aluminum listed.
Tent fabrics and denier: A wide range of specialized nylons and polyesters are used in tents and, like poles, the technology evolves rapidly. One spec you might see, regardless of fabric, is denier (D), the fabric yarn’s weight (in grams) based on a 9,000-meter length of the yarn. Higher numbers indicate more rugged fabrics, while lower deniers are found in more lightweight—and less durable—fabrics. Don’t compare denier unless fabrics are identical, though, because you won’t be accounting for inherent differences in fabric properties.
Tip: If you feel compelled to delve into specs, focus on the poles. The strongest tents will likely have top-grade poles in a hubbed pole set. Or simply look at the seasonal rating, because that’s influenced by the strength of the poles and fabrics in a tent. Material weights, of both the poles and the fabrics, will be reflected by the minimum weight for the overall tent.
Related Articles