
A trail-camera survey – put simply – is the most powerful herd monitoring tool you can use that doesn’t require the assistance of a professional wildlife biologist. On your own, you can estimate deer density, sex ratio, buck age structure, fawn recruitment and more – tons of information that will guide you in achieving Quality Deer Management success where you hunt.
A trail-camera survey involves operating one camera per 100 acres over evenly spaced, baited sites for 14 days. The accuracy of your results depends on how well you run the survey. I compiled the following step-by-step guide for use in Quality Whitetails magazine based on the original research conducted in 1997 by Drs. Harry Jacobson and James Kroll, and I fine-tuned the guide with input from other wildlife biologists who conduct surveys. Even with this guide, you will still have a lot of questions as you work your way through your first trail-camera survey. To answer those questions, QDMA published a book, Deer Cameras: The Science of Scouting, which includes four chapters devoted to helping the reader run successful trail-camera surveys. If you are serious about improving the local deer population through QDM, we strongly encourage you to incorporate trail-camera surveys into your herd monitoring plan.
Of course, some hunters are prevented from conducting baited trail-camera surveys because local or state regulations prohibit the use of bait, such as corn. QDMA’s book goes into detail on different approaches these hunters can use to monitor their local deer population.
Now, for the step-by-step guide.
• Conduct trail-camera surveys in pre-season (after antlers are completely grown but before acorns begin to fall) or post-season (start as soon as hunting season ends but before antler casting begins).
• Avoid timing a survey when natural food sources, such as a heavy acorn crop, will compete with your bait. In general, shelled corn is the best bait to use.
• If you hunt in an area with a traditionally late rut peak (late December into January), wait until October for pre-season surveys so that fawns are old enough to be mobile and appear in survey photos.
• Follow all baiting and feeding regulations in your state.
• Determine the number of cameras needed. On properties smaller than 1,000 acres, use one camera per 100 or fewer acres. On larger properties, use one camera per 160 or fewer acres. NOTE: If you can’t afford or borrow enough cameras, rotate the cameras you have across the survey sites until each site has been monitored 10 to 14 days. If you do this, be sure to start the cameras at the same sites at the same time each year and rotate to new sites in the same order each year to keep survey results comparable across years.
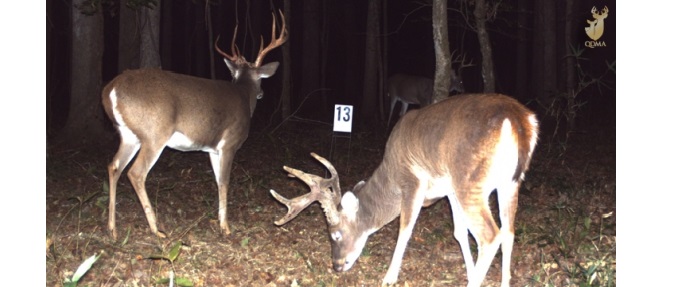
• Using a map or aerial photo of your property, mark off a grid that divides the tract into one block per camera needed. Select a camera site close to the center of each block based on ease of access and deer activity. (deer travel routes, woods roads, etc.). Identify each grid with a number or letter (placing a numbered or lettered sign at each site so that it will appear in the photos will help you later to organize images and data by location. See the photo above as an example).
• Clear ground-level debris at each camera site to allow for clean images of deer. Orient the camera facing north to avoid backlighting caused by sunrise or sunset.
• Locate the camera approximately 12 to 20 feet from the bait, with the bait pile in the center of the image. Precise set-up varies with camera model.
• With digital cameras, set the delay for no less than 5 minutes to keep the number of images manageable.
• Once each site is ready, “pre-bait” for 7 to 10 days. Turn cameras on during this phase and monitor photos to ensure cameras are working and camera setup is good (for example, deer are not too close or too far from the camera).
• After 7 to 10 days, if deer are responding to your bait and traffic at each site is strong, begin the active survey phase (photos from this phase should be kept separate from older photos and saved for later analysis).
• Maintain the survey phase for 10 to 14 days (In research, 14 days captured 90 percent of all unique deer; 10 days captured 85 percent of unique deer, which is adequate for the survey if expenses must be minimized).
• Refresh memory cards, batteries and bait as needed, but otherwise keep human activity to a minimum. Wear rubber boots and gloves and practice scent-control measures whenever you visit the sites.
Collect cameras and compile images. Count the total number of bucks, does and fawns. “Fawns” are all deer under 1-year old, including button bucks. “Total” counts include known repeats of individual deer. Do not count deer you cannot identify as a buck, doe or fawn.
• Study photos closely to count unique bucks based on recognizable antler and/or body characteristics (ask for second opinions from friends or a consultant if any photos present tough calls). For example, you may have 100 total buck images but only 10 unique bucks in all. Your ratio of unique bucks to total bucks is therefore 1:10, or 10 percent (0.10).
Note: QDMA has created a free computation form that makes the next few steps very simple.
• Multiply your ratio of unique-to-total bucks by the total does and fawns to come up with an estimate of unique does and fawns. For example, if you have 200 total images of does and multiply it by your 0.10 ratio, you get an estimate of 20 unique does.
• Apply a correction factor to your estimates. If you ran the survey phase for the full 14 days, multiply each of your buck, doe and fawn estimates by 1.11 to adjust for deer you may not have photographed. If you ran the survey phase for 10 days, multiply by a correction factor of 1.18. The results are your adjusted estimates.
• You now have an estimate of the deer population separated by bucks, does and fawns. Use this data to produce estimated deer density, buck:doe ratio and fawn:doe ratio. Sort unique bucks by estimated age to evaluate age structure. If you need help interpreting results to guide future management decisions, talk to a local wildlife biologist or private wildlife consultant.
• Repeat the survey annually or as regularly as possible, using the same method, timing and camera sites, so that you can monitor trends in herd characteristics.
This may sound more difficult than it really is, but it’s important to think through the details before you launch a trail-camera survey, or else your results may be compromised. The truth is, trail-camera surveys are fun, and they can produce valuable information even for your hunting strategies.
Good luck with your survey, and if you have questions, post them below in the comment section.